How can I get a different
header/footer on the second (and subsequent)
page(s)?
This page last revised:
19 Feb 2026 11:59:14 -0500
.
More on headers / footers
Headers and Footers Tutorial
Letterhead System
Letterhead Tutorial
General Information:
Home
Word Tutorial - Intermediate
Legal Users Guide to Word
Downloads
Books about Microsoft Word - Newsgroup suggestions
Links
Web Resources for Microsoft Word
ADD Balance - Charles Kenyon Home Page
Sections / Headers and Footers / Page Numbering in Word 2007 and later
If you ask the Word Help about this, you won't get a good answer. The assistant will tell you about changing
the header or footer at different places in the document by creating
new sections. That will work because the header/footer instructions
are stored in the last paragraph marker of the section.
Each section has three different
headers and three different footers. Some of these may be empty or not
displayed, but they are there. Every document has at least one section but
can have more. Briefly, the number of header/footer sets displayed for each section is controlled in
Word 97 - Word 2003
File
->
Page Setup ->
Layout (tab)
Word 2007 - 2021/365
Insert (tab) ->
Header (footer) ->
Header & Footer Tools (tab)
by checking either or both of the options:
__ Different odd and even
__ Different first page
in the headers and footers frame (Word 97 - 2003), or

the Header & Footer Tools tab (Word 2007 and
later).

If you have
already set a header or footer and then check "Different first page"
the header/footer you set previously will become the header/footer
for second and subsequent pages. If you check different odd and even,
you can set yet another header/footer for the odd pages that follow
page two.
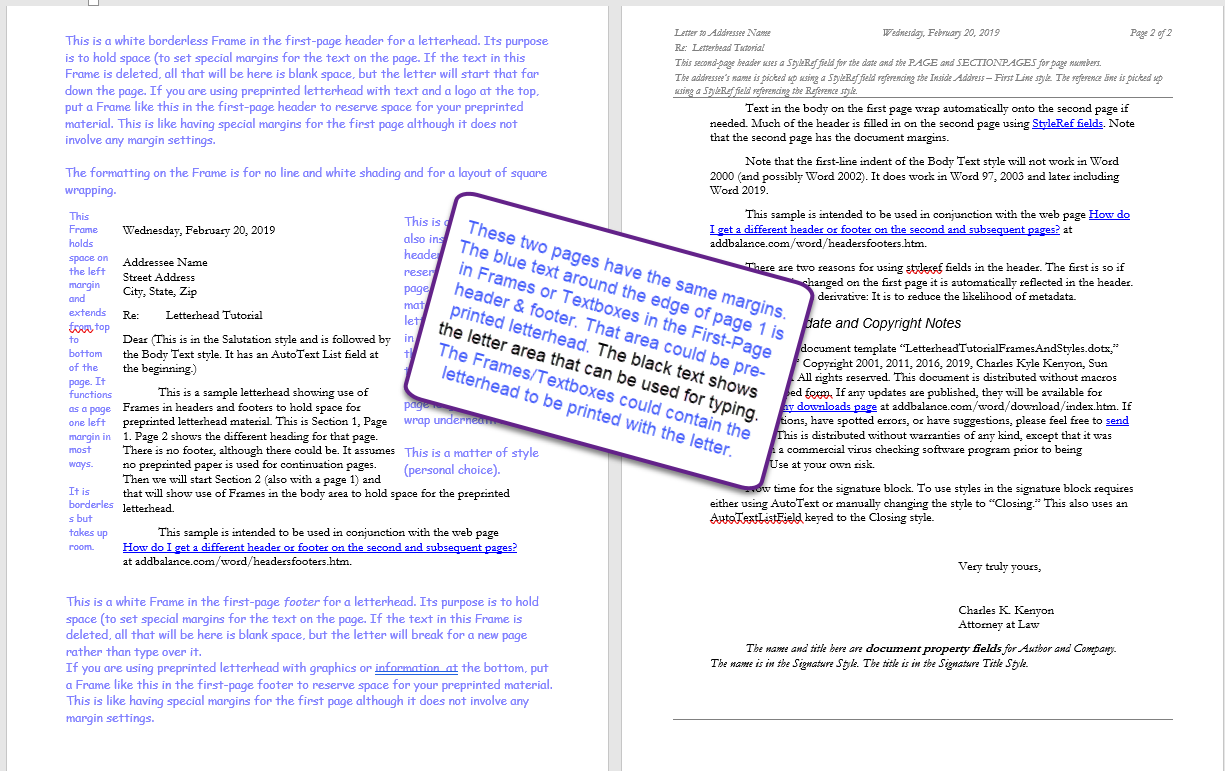
Many experts believe that using headers and footers is the best way to
construct a letterhead template, with the letterhead itself in a
header with headers/footers set for "Different first
page." (Something similar is done when setting up for preprinted
letterhead as well. Even if you will be using preprinted letterhead, follow
along, then take a look at the
Letterhead
Textboxes and Styles Tutorial.)
|
Step-by-Step Instructions
 |
|
|
|
If your template is only one page but the document
based on it can be multiple pages, you will want to set up the
header/footer for all pages or for the second and subsequent pages before
setting a different header/footer combination for the first page. (The
header/footer for all pages becomes the header/footer for second and subsequent
pages when you select the option for a different first page.)
To do this, first (with your template being only one page), .
. .
Switch to the Header/Footer View pane.
Word 2007 - 2021/365
Insert -> Header -> Edit
Header
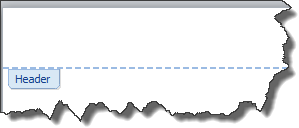
The Header and Footer Tools Tab will become available, and your
insertion point (cursor) should be in an area above a dashed line that says
"Header." (If it says "First Page Header" don't worry, we'll
get to that in a bit. Keep reading.)
The tools on the Header/Footer Tools ribbon tab become available
whenever the user is in a header or footer. Note, unlike the page number
command on the Header/Footer toolbar in earlier versions of Word, the
command on the ribbon for anything except "current position" will
REPLACE the header or footer, not simply add to it. The Date & Time
button still simply adds a date field at the current position.
Alt+Shift+P will insert a page number field at the current location as
well. Likewise, if you Insert one of the headers or footers from a
gallery rather that choose to Edit, Word will replace any existing
header/footer with what you have chosen.
If you are in "Draft" or "Web"
view when you tell Word that you want to view Headers and Footers,
you will be switched to Print View and any text on your
regular page will either turn gray or disappear. When you close the Header and
Footer Tools using the Red X on the right end of the tools, you'll be switched back to the view you started from.
Create the Header for All Pages or for Second and Subsequent Pages
If you want anything to appear in the header for all pages
or for the second and subsequent pages, put it in here (in the window
designated "Header").
Create the Footer for All Pages or for Second and Subsequent Pages
 If you want something in the footer for all pages or for the
second and subsequent pages, click on the "Go to Footer"
button on the Header and Footer Tools tab. If you want something in the footer for all pages or for the
second and subsequent pages, click on the "Go to Footer"
button on the Header and Footer Tools tab.
This will take you to the bottom of the page below where it
says "Footer."
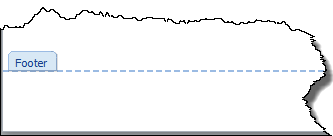
Your insertion point (cursor) will be under the line. You
can get here directly by choosing Insert > Footer > Edit Footer as well.
Create a Different (or No) Header / Footer For the First Page
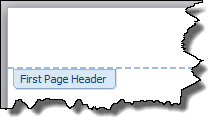
Check the Different First Page checkbox in the Header and
Footer Tools Tab (Options Group)
Now the header box will
say "First Page Header" and anything you typed in the Header or
Footer
before
will be gone!
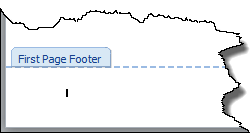
Type what you want to go in the header on the first page of your
document, then click on the Go To Footer button  and type in anything you want in the
first page footer.
and type in anything you want in the
first page footer.
Save your template. When your template is used to create a document, if the
document extends onto a second page, the headers / footers you originally typed
will appear on the second and subsequent pages.
What If It Says "First Page Header[/Footer]" When I Said It
Would Say "Header[Footer]?" in the Border?
Then type in the material for the header / footer to go on
the first page. Uncheck the Different First Page checkbox and type what you want
for your continuation page header / footer. Then check the box again.
Save your template.
Save a Header/Footer setup for use in other
documents
The Headers and Footers in the Galleries are
simply "building blocks." You can save your own Building Blocks in
those galleries if you want. I would recommend storing those
building blocks in your own template (which can be used as a
Global
Template so your building blocks can be available in all your
documents, rather than in the default storage location.
You would select the text in a header / footer
and then press Alt+F3. Assign an appropriate name and pick the
Header or Footer Gallery. Remember in setting a name that names are
displayed in the galleries in alphabetical order. You may want to
use an underscore _ as the first character of the name to make your
entry show up first. Again, consider saving in your own custom
global template rather than the default location if you may want to
copy or share your entries. You can give your entries categories, as
well, if you wish.
See
Boilerplate Text in Microsoft Word for more on using
Building Blocks.
The obvious fields are those for page numbers.
Others to be considered include the StyleRef and Document Property fields.
See
Letterhead
Textboxes and Styles Tutorial - two-page template download that
demonstrates use of:
| Frames/Textboxes in headers and footers to reserve space for
preprinted
letterhead |
| Use of the
StyleRef field to insert information from
the body of a letter into the continuation page headers automatically.
Note that either a character style or a paragraph style will work with the StyleRef field. The style does not have to change any formatting - it can
just serve as a marker for the field. In the tutorial the styles used do
have formatting functions as well -- primarily the paragraph spacing and the
designation of the following style. See
Styles for more on styles. |
| Insertion of a date
automatically that will not change when you open the document at a later
date |
| Beginning with Word 2007, there are
mapped Content Controls
labeled Document Properties under Quick Parts. Information typed
in one of these is reflected automatically anywhere else in the
document the same control is inserted. These can be placed in the
document and also in the Header/Footer. |
You can use design techniques to visually distinguish
the header and footer from the body of the document.
This can make your document easier to read.
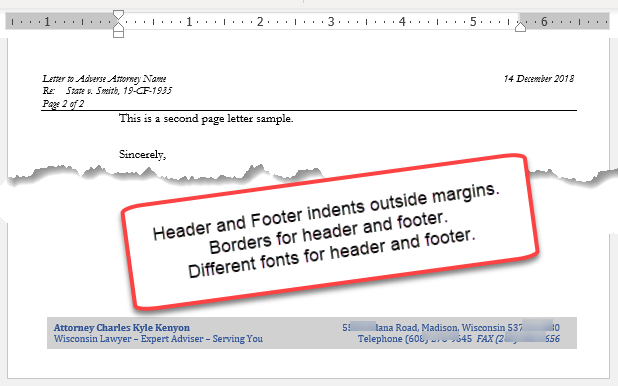
See
Visual Design Techniques to Distinguish Headers and Footers from the
Body.
If your template is only one page but the document
based on it can be multiple pages, you will want to set up the
header/footer for all pages or for the second and subsequent pages before
setting a different header/footer combination for the first page. (The
header/footer for all pages becomes the header/footer for second and subsequent
pages when you select the option for a different first page.)
To do this, first (with your template being only one page), .
. .
Switch to the Header/Footer View pane.
Word 97 - 2003
View ->
Header and Footer
 The Header and Footer toolbar will pop up and your
insertion point (cursor) should be in a box with a dashed border that says
"Header." (If it says "First Page Header" don't worry, we'll
get to that in a bit. Keep reading.) If you are in "Normal" or "Web"
view when you tell Word that you want to view Headers and Footers,
you will be switched to Page Layout (Print Layout) view and any text on your
regular page will either turn gray or disappear. When you close the Header and
Footer toolbar, you'll be switched back to the view you started from. The Header and Footer toolbar will pop up and your
insertion point (cursor) should be in a box with a dashed border that says
"Header." (If it says "First Page Header" don't worry, we'll
get to that in a bit. Keep reading.) If you are in "Normal" or "Web"
view when you tell Word that you want to view Headers and Footers,
you will be switched to Page Layout (Print Layout) view and any text on your
regular page will either turn gray or disappear. When you close the Header and
Footer toolbar, you'll be switched back to the view you started from.
(No toolbar in Word 2007 and later, sorry. You have the
ribbon. You can do these same things by controls on the Insert tab and the
Headers & Footers tab.)
Create the Header for All Pages or for Second and Subsequent Pages
If you want anything to appear in the header for all pages
or for the second and subsequent pages, put it in here (in the window
designated "Header").
Create the Footer for All Pages or for Second and Subsequent Pages
If you want something in the footer for all pages or for the
second and subsequent pages, click on the "Switch Between Header and Footer"
button on the Header and Footer toolbar.
This will take you to a box at the bottom of the page that
says "Footer."

Create a Different (or No) Header / Footer For the First Page
Click on Page Setup on the toolbar.

This will display the Page Layout Dialog Box.
Check the box for "Different first page" and then
click on OK to close that dialog. Now the header box will
say "First Page Header" and anything you typed in the " Header" box
before
will be gone!

Type what you want to go in the header on the first page of your
document, then click on the Switch button
and type in anything you want in the
first page footer.

Save your template. When your template is used to create a document, if the
document extends onto a second page, the headers / footers you originally typed
will appear on the second and subsequent pages.
What If It Says "First Page Header" When I Said It
Would Say "Header?" in the Box's Border?
Then type in the material for the header / footer to go on
the first page. Click the "Close" button on the Header and Footer
Toolbar and insert a manual page break. That will move your insertion point into
Page 2.
If you now use
View ->
Header and Footer
the same toolbar will pop up but this time the caption in
the dashed border of the box will be "Header." Type what you want
for your second and subsequent page header here, switch to the footer and type
that for the second and subsequent page.
Click Close on the Header/Footer Toolbar and use backspace to
delete your page break.
Save your template.
You can use fields to automatically put information
in headers and footers
There are obviously the fields on the header/footer toolbar.
Others to be considered include the StyleRef and Document Property fields.
See
Letterhead
Textboxes and Styles Tutorial - two-page template download that
demonstrates use of
| Textboxes in headers and footers to reserve space for
preprinted
letterhead |
| Use of the
StyleRef field to insert information from
the body of a letter into the continuation page headers automatically.
Note that either a character style or a paragraph style will work with the StyleRef field. The style does not have to change any formatting - it can
just serve as a marker for the field. In the tutorial the styles used do
have formatting functions as well -- primarily the paragraph spacing and the
designation of the following style. See
Styles for more on styles. |
| Insertion of a date
automatically that will not change when you open the document at a later
date |
| AutoTextList field |
| Document Property fields for Author and Company
in signature block (incorporated in AutoText entry) |
Save a Header/Footer setup for use in other
documents
The Headers and Footers patterns can be saved as
AutoText. I would recommend saving your AutoText in your own template (which can be used as a
Global
Template so your headers and footers can be available in all your
documents, rather than in the default storage location (normal.dot).
You would select the text in a header / footer
and then press Alt+F3. Assign an appropriate name. Remember in setting a name that names are
displayed in alphabetical order. You may want to
use an underscore _ as the first character of the name to make your
entry show up first. Again, consider saving in your own custom
global template rather than the default location if you may want to
copy or share your entries. You can give your entries categories, as
well, if you wish.
See
Boilerplate Text in Microsoft Word for more on using
AutoText.
Troubleshooting
Page numbers only show up on the first page.
Question:
I need the page number at the bottom of page one (have that) but
at the top of the other pages. How do I do this? I have used the
long method by Word: unchecking "different first page" on page one
(checking it for other pages) and having it checked on second
page/section. Also, "link to previous" is unchecked. But it will not
allow me to (or does not show) page numbers from page 2 on. I
attempt to "format page numbers" but nothing happens.
On page one the header/footer reads (in light blue):
Header-section 1 and Footer- Section 1
On page two the header/footer reads (in light blue): First Page
Header Section 2 and First Page Footer Section 2 The "show field
codes instead of their values" has been unchecked and the "Building
Blocks.dotx " is not disabled.
Response:
I assume you have more than one page now. I assume you are on
page 1. I assume you only have one section. Insert Tab
Header
Edit Header
Put cursor where you want your page number on following pages.
Press the key combination Alt+Shift+P or click on the Page
Number button, and select Current Position | Plain Number.
You now have page numbers in your headers Check the box for
"Different First Page"
This makes what you just entered appear only on pages after the
first one. Go to your First Page Footer
Put cursor where you want your page number on the first page.
Press the key combination Alt+Shift+P or click on the Page
Number button, and select Current Position | Plain Number.
You now have a page numbers in your first page footer.
(You could just type "1" instead.)
Double-click in the document body to quit editing your headers and
footers.
|
The tools on the Header/Footer Tools ribbon tab become available
whenever the user is in a header or footer. Note, unlike the page number
command on the Header/Footer toolbar in earlier versions of Word, the
command on the ribbon for anything except "current position" will
REPLACE the header or footer, not simply add to it. The Date & Time
button still simply adds a date field at the current position.
Alt+Shift+P will insert a page number field at the current location as
well.
Page numbers only show up on the first page.
Question:
I need the page number at the bottom of page one (have that) but
at the top of the other pages. How do I do this? I have used the
long method by Word: unchecking "different first page" on page one
(checking it for other pages) and having it checked on second
page/section. Also, "link to previous" is unchecked. But it will not
allow me to (or does not show) page numbers from page 2 on. I
attempt to "format page numbers" but nothing happens.
On page one the header/footer reads (in light blue):
Header-section 1 and Footer- Section 1
On page two the header/footer reads (in light blue): First Page
Header Section 2 and First Page Footer Section 2 The "show field
codes instead of their values" has been unchecked and the "Building
Blocks.dotx " is not disabled.
Response:
I assume you have more than one page now. I assume you are on
page 1. I assume you only have one section. Insert Tab
Header
Edit Header
Put cursor where you want your page number on following pages.
Press the key combination Alt+Shift+P or click on the Page
Number button, and select Current Position | Plain Number.
You now have page numbers in your headers Check the box for
"Different First Page"
This makes what you just entered appear only on pages after the
first one. Go to your First Page Footer
Put cursor where you want your page number on the first page.
Press the key combination Alt+Shift+P or click on the Page
Number button, and select Current Position | Plain Number.
You now have a page numbers in your first page footer.
(You could just type "1" instead.)
Double-click in the document body to quit editing your headers and
footers.
|
More on headers - footers:
Return to
Questions
List
The up-to-date version of this FAQ may be
found at:
http://www.addbalance.com/word/
Download this FAQ in Word
97 format

Changes / suggestions / ideas can be sent to
Charles
Kenyon.
 views since 13 April 2004
|