![]()
This index page last revised: 19 Feb 2026 11:59:57 -0500 .
![]()
The Home Tab in Word 2007 - Word 2024(365)
This page is about the Home tab and its controls. I attempt to distinguish those controls that apply a formatting to text and those which change text (and the hybrid which is highlighting). Although the program Word for the Mac has a similar Home tab, this page describes the Windows version. In particular, the Mac program does not have Dialog Launcher button which give access to more controls. In the Mac programs, these are reached through the menus.
The Home Tab - the basic workspace in a document:
Purpose
The Home Tab is about the basics of how text looks when it is printed or displayed online. It gives access to both direct and Style-based formatting. Because of the importance of Styles to using Word effectively, it devotes a great deal of space to Styles. The Home Tab is the one that first shows on a page in Word.
I suspect that many Word users seldom stray from the Home Tab. They are missing many opportunities to make Word work for them, but that is not the topic of this page. On this page I intend to examine the control groups on the Home Tab and what each of the controls does. This leads into the Font and Paragraph dialogs and the Clipboard functions of Word.
The Home Tab has its controls arranged in five (six) groups from left to right:

Clipboard -- Font -- Paragraph -- Styles -- Editing -- Voice (2019)
Group names are at the bottom of the Ribbon and groups are separated by a thin line. Most but not all groups have a dialog launcher button in the bottom right corner of the group. The Home Tab shown above is a screenshot from Word 2010. The Home tab has varied slightly through Word versions. These variations are shown at the end of this page.
Word 2019/365 has added a sixth group at the far right: Voice. It holds a Dictate button.
I do not pretend to know what every control does, especially the ones on the dialog boxes. I will tell you what I know. If I am speculating or guessing, I will try to make that clear. As I learn more, this page will be changed. This is a "work in progress."
The Clipboard Group

The clipboard group is on the far left of the Home Tab. It is often used in conjunction with the Editing group, which is on the far right of that tab.
|
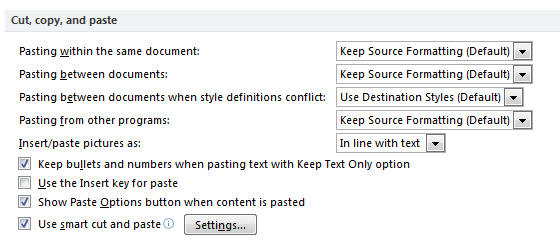
Paste (with options) Ctrl+V: I have been told that when
Microsoft studied Word users, they discovered that the most used Command was
"Paste" |
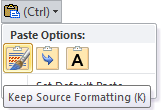
Button Drop-Down - Ctrl Key Result
|
|
The Cut Button is the mouse equivalent of Ctrl+X.
| |||||||
|
The Copy Button also puts selected text or graphics
into the Clipboard. It remains where it is, though. | |||||||
|
The Format Painter (Brush) (Ctrl+Shift+C to copy formatting, Ctrl+Shift+V to paste formatting)
| |||||||
|
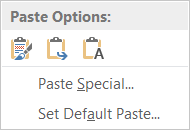
These all work with the Office Clipboard as well as
the System Clipboard. You can see what is in the Office Clipboard by
clicking |
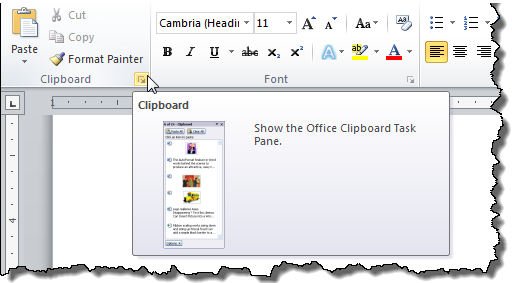
|

The top of the Office Clipboard Task Pane will tell you the
number of items in the clipboard out of the possible 24. If, with the
Clipboard Task Pane showing, you click on one of the items, it will be
pasted into your document at the current insertion point
even if it was not
the last item placed in the clipboard.
|
Note, the (Windows) System Clipboard holds the last item cut or copied. It only holds one item.
Clipboard -- Font -- Paragraph -- Styles -- Editing -- Voice (2019)
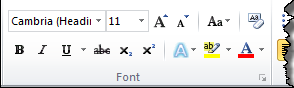
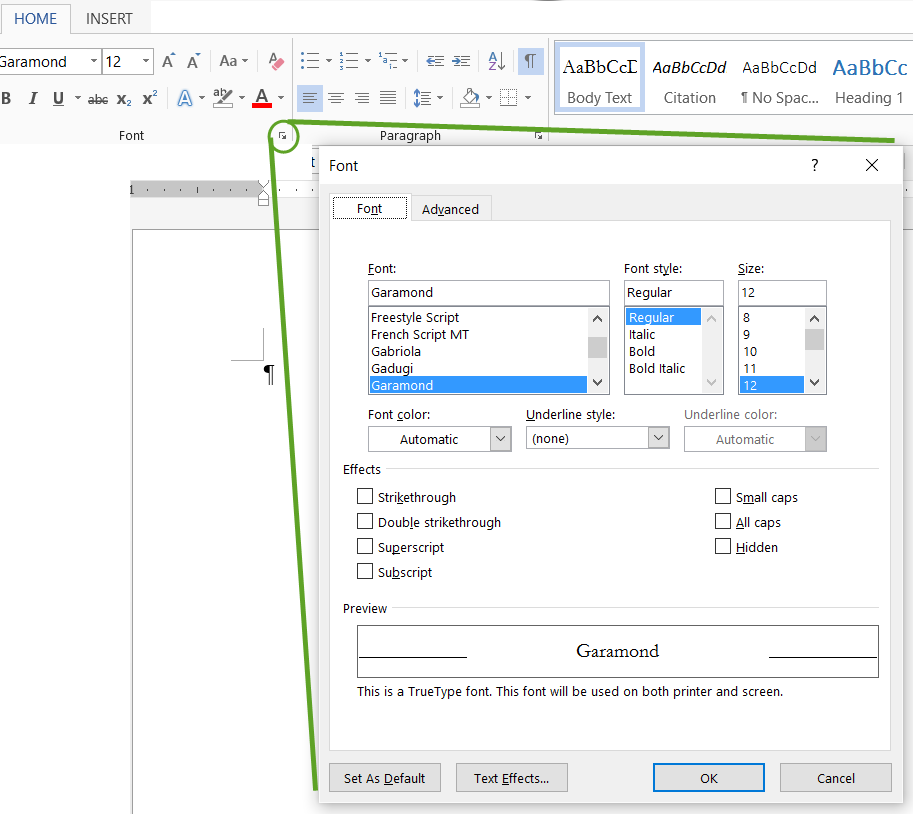
The Font Group
The font group has to do with how characters look. It is distinguished from the paragraph group where the formatting handles
the entire paragraph. I am going to divide these controls into three parts:
Controls that give you direct formatting or erase that formatting,
A Control that changes the Case of text but is not formatting, and
Controls that change how the text looks but are not considered formatting.
Let's look at the last two types, first, because there are only two of them.
|
Change Case:
| |
|
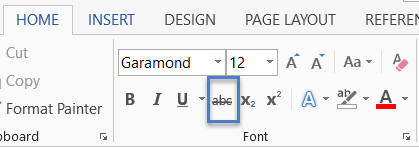
Highlighting:
|
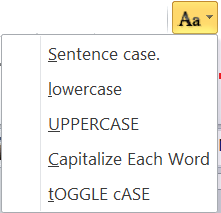 - Note that Small Caps is not one of the options.
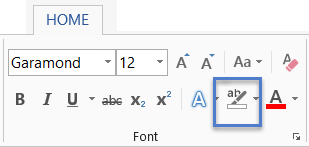 - Highlighting is not considered formatting in Word
Next is the Oops button: Clear Formatting, which will strip the effects of the other buttons in the font group from selected text.
|
Clear All Formatting
| |
|
|
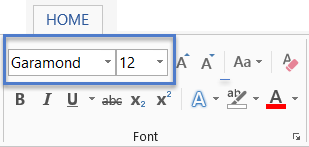
The following are all considered Direct Formatting by Word and can be cleared by the Clear Formatting button (or by Ctrl+Spacebar).
|
Font Dropdown and
Font Size Dropdown |
|
Increase Font Size - Grow Font | |
|
Decrease Font Size - Shrink Font |
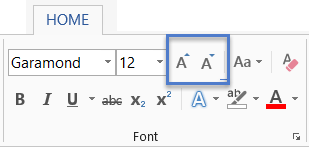
|
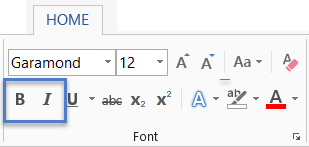
Bold (Ctrl+B) | |||||||||
|
Italic (Ctrl+I)
| |||||||||
|
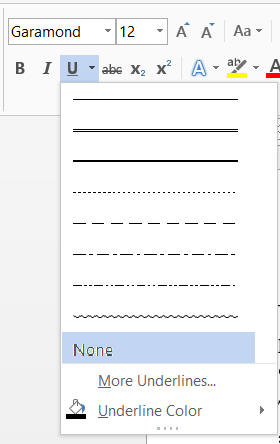
Underline (with options)
(Ctrl+U)
| |||||||||
|
|

|
|
|
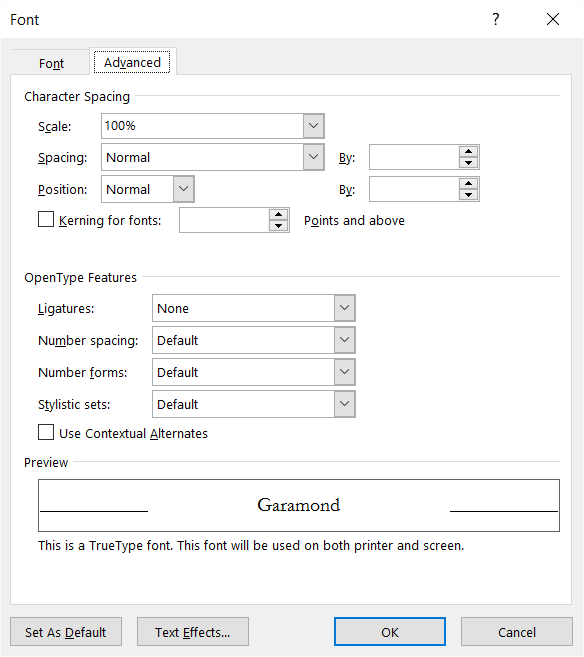
Font Dialog Launcher
(Ctrl+D)
|
Clipboard -- Font -- Paragraph -- Styles -- Editing -- Voice (2019)
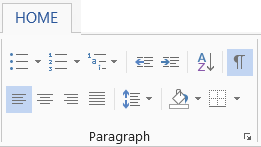
The Paragraph Group
Bullets and Numbering is the top-right section of the paragraph group.
For simple documents that will not need much editing, these will work fine.
|
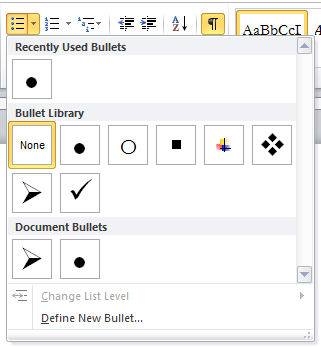
Bullets |
The first button is for bullets. Clicking on the bullet button will give you a bullet, the type of bullet will be the last type used by you. Following paragraphs will have the same bullet type. When you press the Enter key to create a new paragraph in an empty line, Word will discontinue use of bullets. When you click on the button, Word changes the indents to add a "hanging indent" that indents both the bullet and the associated text.
Clicking on the down-pointing triangle will give you choices.
You can also choose to define your own bullet icon.
For documents that are going to be heavily edited or with multiple kinds of bullets, I recommend use of bullets linked to Styles. See How to control bullets in Ribbon Versions of Word by Shauna Kelly.
|
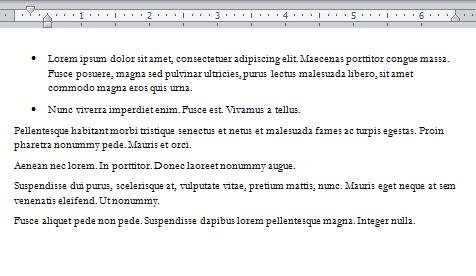
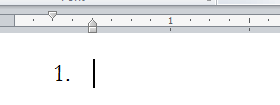
List Numbering |
The second bullet is for simple numbered lists. Clicking on the button will give you a single-level numbered list of the type last used. Shown below is such a number inserted with the ruler showing.
Included with the numbering is a first-line indent and a hanging indent. Your numbered list will be set in from the margin and following lines in the paragraph will be set in more.
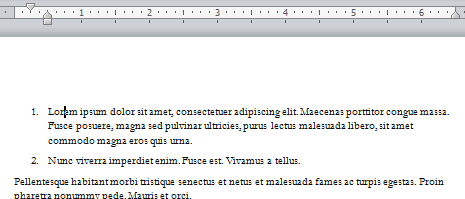
As with bullets, you can apply this to existing paragraphs.
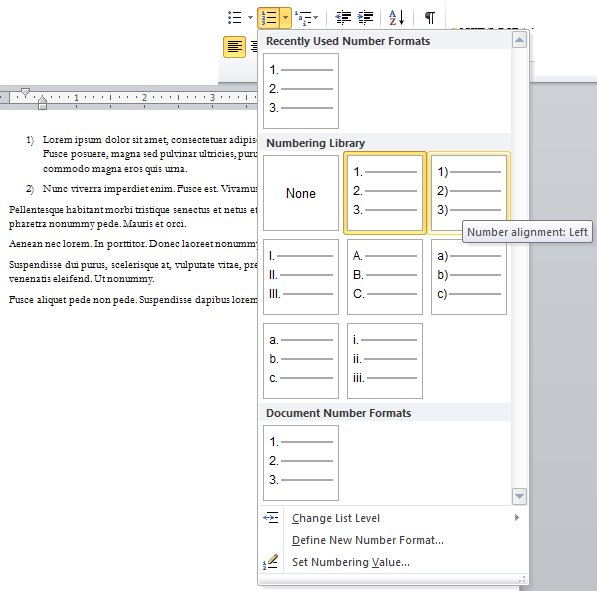
As with bullets, the down-facing triangle will give you more choices.
The screenshot above shows the gallery of choices. As with the bullets gallery, the list number gallery lets you preview your choice for selected text. In this show, the current choice is with the full stop following the number; the previewed choice is with a right parenthesis. As with bullets, you can define a new format. In addition, you can reset or restart your numbering.
Again, with simple documents that will not be edited much, this button works fine. For anything more complex, you will want to go to Numbering linked to Styles. See How to create numbered headings or outline numbering in Ribbon Versions of Word by Shauna Kelly. This method gives much finer control and is much less prone to development of "spaghetti numbering."
|
Text Direction Controls - East-Asian Languages |
If any East-Asian language is enabled, the Paragraph Group on the Home tab will include two additional controls to change the text direction. When used with a non-East-Asian language, they do not really change the direction but do change the ruler and other things. This is explored more in my page on Alignment and Justification.
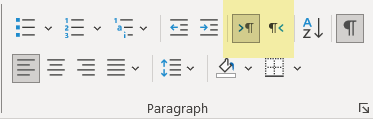
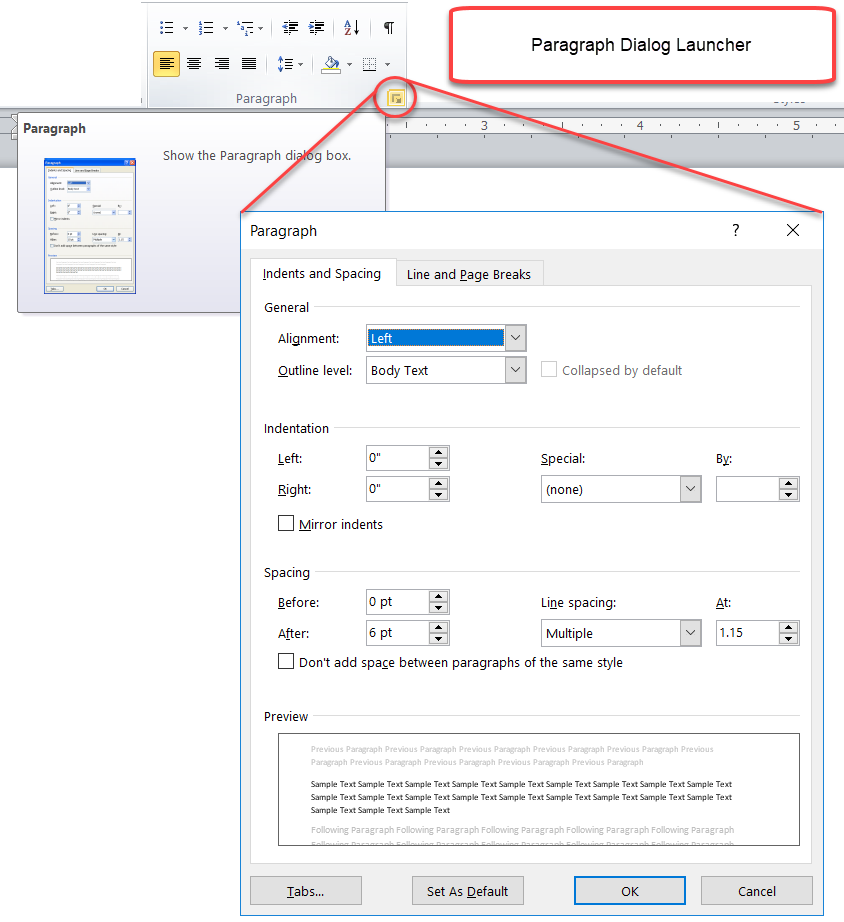
The little arrow in the bottom right corner of the Paragraph group launches the Paragraph Formatting dialog. Again, such formatting is best done using Styles rather than directly.
Clipboard -- Font -- Paragraph -- Styles -- Editing -- Voice (2019)
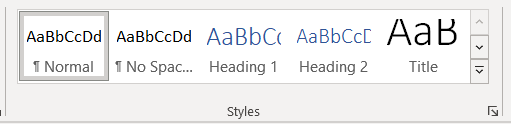
The Styles Group

The Styles Group in Word 2007-2010 is shown above. The Styles Group for 2013 and later no longer has the Change Styles dropdown.
That has been moved to the design tab in those versions.
From Word 2016 on it has become smaller horizontally but still has the expansion dropdown menu.
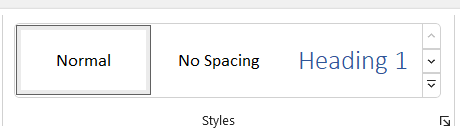
With Word 2021 and Windows 11, a different look was introduced, called the "New Experience."
It changed the Styles Group, removing the unformatted names of the styles and instead showing them formatted.
This decreases the number of styles that can be displayed.
That change was reversed in late 2024.
However, Update 2412 changed the arrows at the right end of the [Quick] Styles Gallery. This changes more recent versions.
There is now a single arrow that expands the Gallery.It is possible to add style controls to the Quick Access Toolbar. Here is a link to my free Add-In that does this: Styles QAT Add-In.
Clipboard -- Font -- Paragraph -- Styles -- Editing -- Voice (2019)
The Editing Group
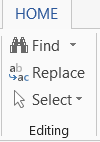
The Editing Group actually appears on the far right end of the Home Tab.
The Editing Group has three choices, two of which are drop-down.
|
Find
| |||||||||||
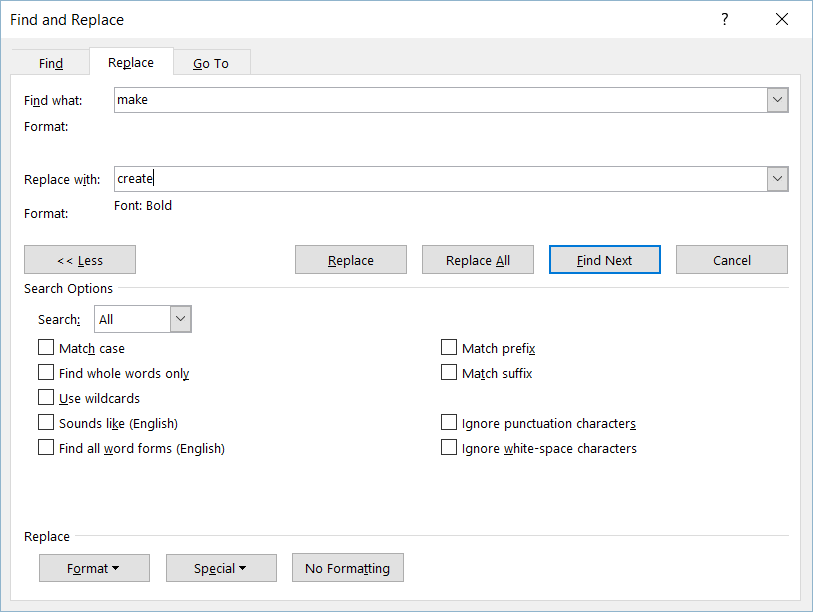
|
Replace (Ctrl+H) opens the
Replace dialog box shown below.
|

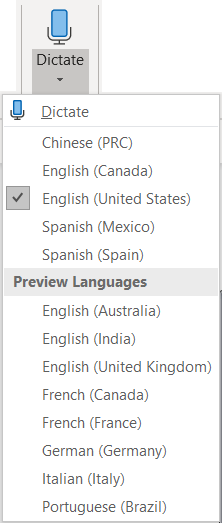
The Voice Group - Dictate Office 2019-2024/365 Only
Note that the Online version of Word also has a Transcribe function.
As far as I know, this is the only function available in the Online version that is not in the Desktop applications.
Variations on the Home Tab
This page has been exploring the controls in Word 2010 and 2013. The Home tab has remained mostly the same in all versions of Word. Here are some screenshots.
Word 2007
-Word 2007 - wider
-Word 2007 - narrower
The three tabs above are all screenshots of the ribbon on the same computer. Word repackages the ribbon tabs to fit the available space. Here, I've simply decreased the size of the screenshots of the wider versions.
In the wider version, it gives more space to the Styles Gallery. In the narrower version some buttons shrink or lose captions. The combination of screen size and resolution determines what you will see, so your ribbons may not look exactly like any of the ones shown here. Another example showing different screen layouts is in the Word 2010 version of the Drawing Tools contextual tab below. Your ribbon may or may not have a Developer Tab, that is up to you.
The Word 2007 and 2010 tabs shown are from a laptop running Windows Vista. The Word 2013 tabs are from a desktop tower running Windows 7 on a larger screen.


Word 2010
Word 2010 - Narrower

(Note the collapse of the QuickStyles Gallery and Editing Group. The Quick Styles gallery is now available through the dialog launcher button next to the word "Styles.". Other groups are compressed. This is less than half as wide as the one immediately above it.)
Word 2013

Word 2016/365
Original Word 2016
Word 2016/365 in 2018 - Note Voice/Dictate Group on Right
Word 2019/2021/365 in 2023
Word 2021/365 New Experience applied in 2023 - major change is look of Quick Styles Gallery and addition of Editor


Changes / suggestions / ideas can be sent to Charles Kenyon.
![]()
This page viewed
times since 14 April 2004.